![]()
Wells Guitar Co.
(781) 361-1471
![]()
|
|
The Double Tenon Neck Joint The purpose of this article is to explain how to attach the neck of the guitar to the body without any glue at all. I believe this neck joint was first conceived by Dana Bourgeois (hat's off to him!). However, as far as I know, no source gave the reader any specifics or measurements on the method. I though it would be a good idea to share this information with other Luthiers who would like to try the joint and, perhaps, incorporate it into their own instruments. Why would you want a neck joint that contained no glue? Simply put, it allows for extremely easy adjustment of the playing action at any age of the guitar. All instruments, at some time, require a neck reset. This joint allows that to be done in a matter of minutes rather than hours. The joint also eliminates the dreaded popsicle brace and replaces it with a piece of wood that is wider than the fretboard, thereby eliminating the possibility of cracks developing along the fingerboard line into the top (as seen on most instruments over twenty years old). How does it sound? I could detect no audible difference in the way my instruments sound with the double tenon joint as compared to a straight bolt on with a glued fretboard. I see no downside to using this joinery method. I have adopted it for all of my instruments. Enough of the history and reasons for the joint. Let's talk about how to do it.
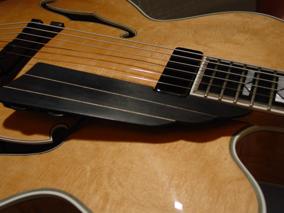
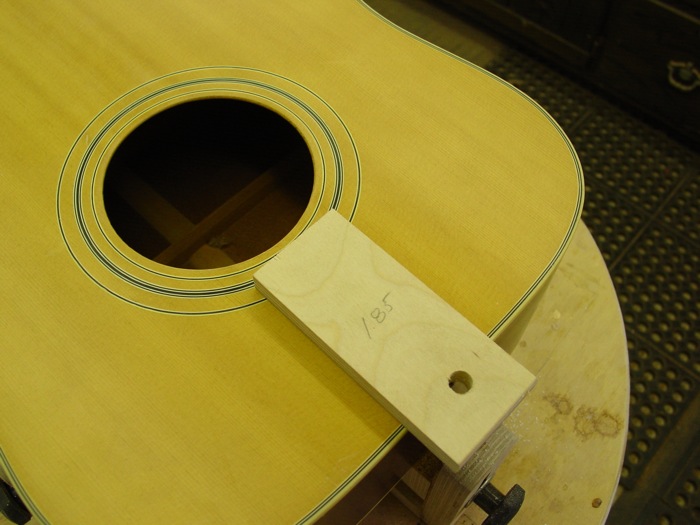
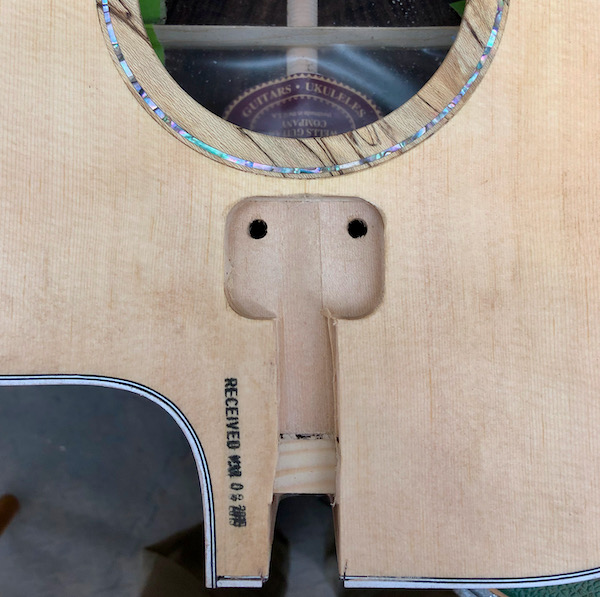
Here is a photo of the body of the guitar made ready for the fretboard. Let's go through the specifics: Make the guitar body as you normally would. However, leave your upper transverse brace very beefy along its' length (Mine are 5/8" x 1/2"). This brace transmits the stress from the block attempting to rotate and disperses it to the sides of the instrument reducing the need for a neck set in the near future. While building the top, glue a piece (I use spruce but mahogany or baltic birch plywood would suffice) 2 ¾” wide and .425” deep (and with a truss rod slot routed in the piece if your rod is adjusted through the soundhole) from the horizontal brace to the neck block on the centerline of the top as shown below. Once glued to the top drill from the bracing side a locating hole to locate the position of the back (towards the neck) of the horizontal top brace from the top because when the top is glued to the body you can no longer see the horizontal brace's location. This is important because it defines the end of the rout in the body for the neck.
After binding the body and a general cleanup, do a rough set of the neck. Insure the neck is centered on the top. Once the neck is right scribe a line around the outside of the fretboard. From your previous mark, locate the horizontal brace. This locating hole is the end of the rout into the top (soundhole side not shown in the photos).
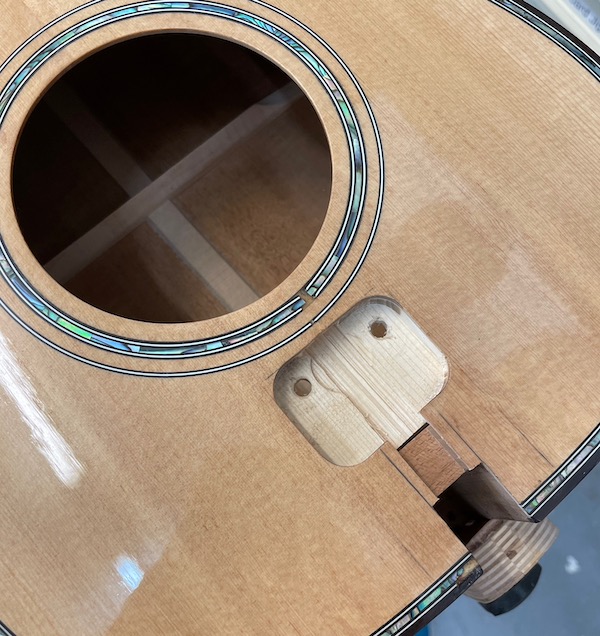
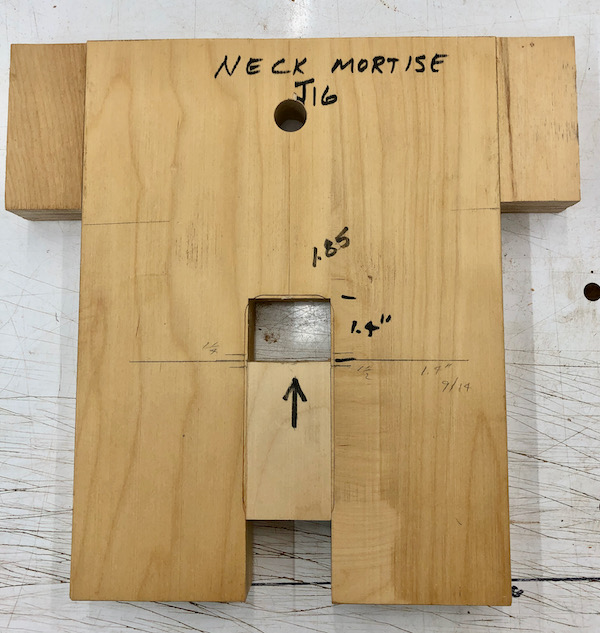
Now take the 1.85" template (shown below) and center it on the fretboard outline. The distance is to the back of the horizontal brace.
Trace its’ location on the top. Line up the 1.85” jig (this piece is the exact size of the jig opening) on the lines and clamp in place.
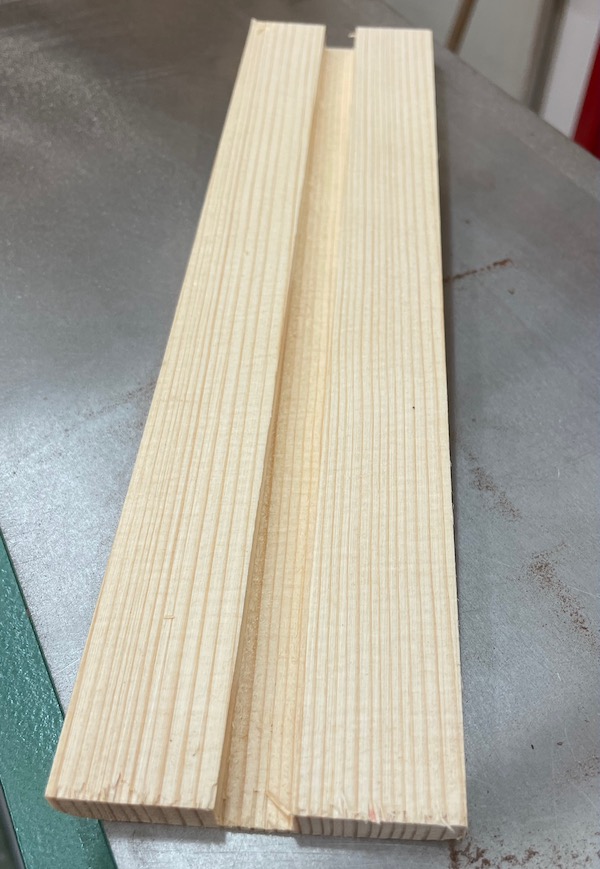
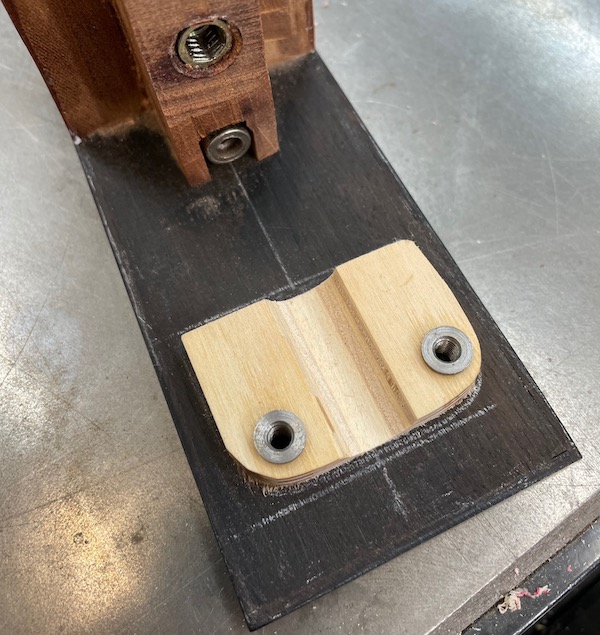
Using a top bearing flush cutting router bit, rout the mortise in the body 1.85” wide. .290-.300 deep. The body should look like the first picture in this article. Set the body aside. Fit the neck and fretboard over the hole in the body. Carefully mark on the fretboard the beginning and end of the mortise hole in the body. Mark lines on the underside of the fretboard showing this location. Cut a piece of the tenon material (1/4” baltic birch plywood - 1.25" long and 1.75" wide). Locate 2 places where the inserts will go as close to the soundhole end as possible. Drill 7/32” holes for the 8/32 inserts (McMasterCarr.com #94738A100). Install the inserts.
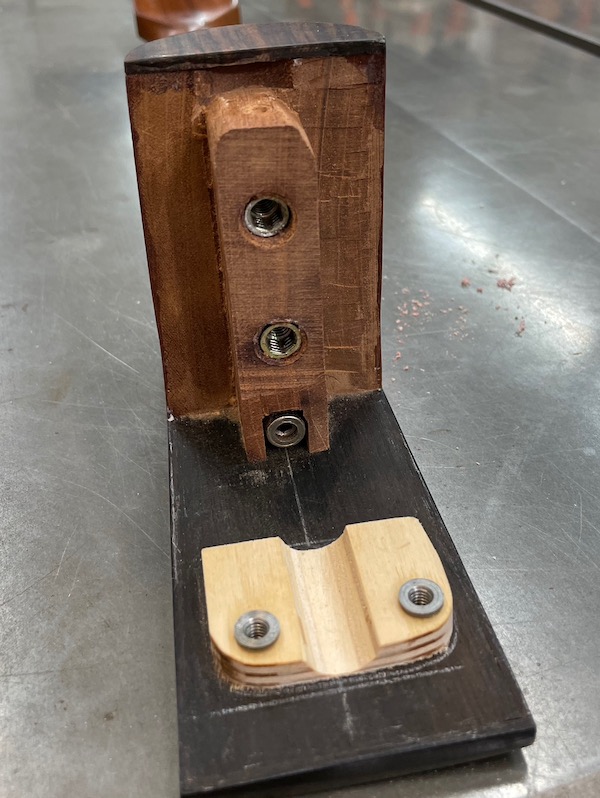
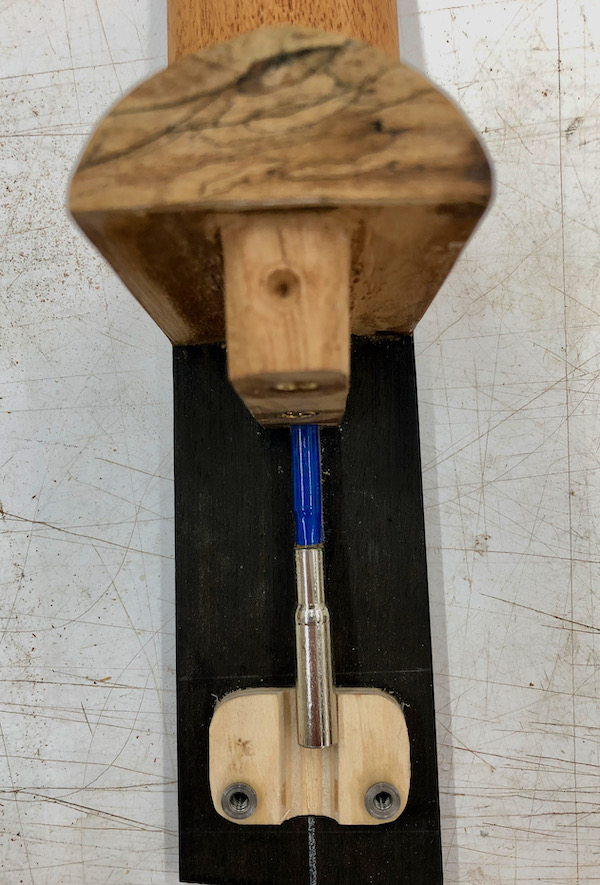
Double stick tape the tenon to the fretboard between the lines marking the location of the hole in the body. Check the fit in the body mortise. Make sure everything fits! If so, scribe a line around the tenon on the fretboard. Remove the tenon and double stick tape and glue the tenon on the fretboard using the lines as your pattern. When you initially obtain the bolts that hold the tenon to the body, take two of the bolts, cut the heads off and grind a point on them. These become your locator pins to determine where to drill the holes in the body. Or, alternatively, you can purchase these from McMaster Carr or another supplier. When the tenon is dry, take the pointed bolts and screw them point up into the inserts in the tenon. Fit the neck pressing hard on the area with the pointed bolts. This will give you the location of the holes in the body brace. Drill the holes in the body brace with a 1/4” bit (oversized). To install the neck, first attach using the two bolts that hold the neck to the body. Then, using 9/16” long 8/32 bolts and washers and lock washers (McMasterCarr.com), attach the fingerboard. Snug down tight but do not overtighten! If, for some reason, the fretboard is not flat to the top, undercut the bottom of the fretboard just like you would undercut the neck joint to get a good fit. Remember, only the outside of the fretboard will be actually touching the top and will be seen.
Lastly, here are photos of the completed neck joint. The neck joint itself (which we have not talked about) uses 1/4 x 20 steel inserts and 1/4 x 20 bolts. I cannot tell you the length of the bolts for your application because it would vary depending on how you cut your neck tenon. All of this hardware for the double tenon neck joint is available either at your local Home Depot, Lowes or other supply store.
|
|
|